
My kitchen, usually a battleground of flour explosions and frantic timers, magically transforms when I dive into simple no bake dessert recipes. Imagine: pure deliciousness without turning on the oven, a true marvel! These effortless confections are my secret weapon for instant gratification. No more sweating over a hot stove or fretting about oven temperatures; just pure, unadulterated joy in every chilled bite. Effortless preparation allows you to create stunning desserts with minimal fuss, perfect for even the busiest days. Rich and satisfying flavor profiles offer a delightful range, from decadent chocolate to vibrant fruit, pleasing every palate. Visually stunning layers and vibrant colors make these treats an impressive centerpiece for any gathering. Incredible versatility means endless customization possibilities, adapting to your favorite ingredients and dietary preferences with ease.
Why Simple No Bake Dessert Recipes Are Your Culinary Superpower
There’s a certain kind of magic that happens when you discover a dessert that requires absolutely zero interaction with an oven. For years, I believed dessert mastery was only for those blessed with patience and a precise internal timer. My past attempts often ended with creations that were either raw in the middle, burnt on the edges, or somehow both. But then, a revelation! The world of simple no bake dessert recipes opened up, and suddenly, my kitchen transformed from a source of anxiety into a haven of chilled, sweet triumph. This isn’t just about avoiding a hot kitchen during summer; it’s about reclaiming your sanity, saving time, and still delivering a show-stopping treat that will have everyone asking for the recipe. Imagine the sheer bliss of whipping up something incredibly impressive while simultaneously binging your favorite show, without once having to leap up to check on a delicate soufflé.
We’ve all been there: a sudden craving, unexpected guests, or the sheer terror of hosting a potluck and realizing you completely forgot dessert. In these moments of panic, the humble no-bake recipe swoops in like a caped crusader. It’s the kind of hero that doesn’t demand a preheated oven or a culinary degree. All it asks for is a little mixing, some clever layering, and the glorious power of refrigeration. The beauty of these quick treats lies in their forgiving nature. There’s less precision required, meaning more room for creative flair and a lower chance of a dessert disaster. Plus, the chilling time isn’t just for setting; it’s a built-in excuse to relax and anticipate the deliciousness to come. Who knew dessert-making could be so incredibly Zen?
Escaping the Oven’s Tyranny
Let’s be honest, sometimes the mere thought of turning on the oven is enough to make us break into a sweat, especially on a sweltering afternoon. Or perhaps you’re a culinary rebel who simply despises preheating. Whatever your reason, these effortless confections offer a blissful escape. They invite you to embrace a more laid-back approach to baking (or rather, non-baking). You can skip the endless struggle with temperature conversions, the fear of undercooked centers, and the constant peeking through the oven door. Instead, you get to play with vibrant colors, exciting textures, and robust flavors, all while your kitchen remains blissfully cool. It’s a culinary revolution for the time-strapped, the heat-averse, and anyone who believes that deliciousness shouldn’t come at the cost of your calm. From rich chocolatey layers to bright, fruity parfaits, the spectrum of what you can create without a lick of oven heat is truly astounding.
Unlocking the Magic of Texture and Flavor
The allure of simple no bake dessert recipes extends far beyond their ease of preparation; it’s truly about the delightful interplay of textures and the vibrant explosion of flavors they offer. Think about it: crunchy cookie crusts, silky smooth creams, chewy caramels, and the fresh burst of berries, all harmoniously layered together. These treats are a sensory adventure, designed to surprise and delight with every spoonful. Unlike their baked counterparts, which often rely on a single, uniform texture, no-bake desserts celebrate variety, creating a dynamic eating experience. This emphasis on contrasting textures is what makes them so utterly irresistible and leaves a lasting impression. Each component maintains its unique character, contributing to a complex yet comforting whole.
Chocolatey Creations Beyond Belief
For the chocoholics among us, no-bake desserts are a true godsend. You can achieve levels of fudgy decadence that even the most elaborate baked chocolate cake struggles to match, and all without turning on a single burner. Imagine a rich chocolate peanut butter bar, where a crunchy graham cracker base meets a creamy peanut butter filling, topped with a luscious ganache that sets perfectly in the fridge. Or perhaps a decadent chocolate lasagna, with layers of crushed chocolate cookies, fluffy cream cheese, rich pudding, and a generous dusting of chocolate shavings. These are not just desserts; they are edible works of art, built layer by delicious layer. The secret lies in quality ingredients and allowing ample time for chilling, which transforms liquid mixtures into solid, sliceable slices of heaven. They’re proof that sometimes, the simplest methods yield the most profound flavors, especially when chocolate is involved.
Fruity Feasts and Creamy Confections
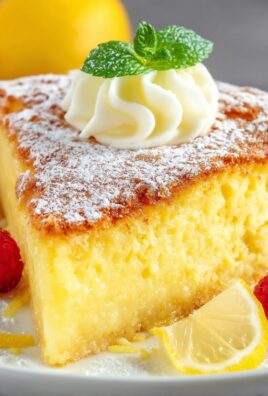
If your palate leans towards something lighter and brighter, no-bake fruit-forward desserts are your perfect match. Picture a vibrant berry parfait, where layers of fresh mixed berries, creamy yogurt or whipped coconut cream, and crunchy granola create a symphony of textures and tastes. These refreshing delights are ideal for summer gatherings or when you simply crave a guilt-free indulgence. For those who adore cheesecake but dread the water bath, a no-bake cheesecake is a revelation. Using cream cheese, heavy cream, and perhaps a touch of agar-agar for extra stability, you can achieve that signature tangy, creamy texture without the fuss. The possibilities are endless: lemon, raspberry, mango – whatever fruit captures your fancy can be folded into a dreamy, chilled confection. These simple no bake dessert recipes prove that you don’t need heat to create something incredibly elegant and utterly delicious; just a little imagination and a whole lot of delicious ingredients.
Essential Tips for No-Bake Nirvana
Embarking on your no-bake adventure should be a joyful experience, not a guessing game. While these dessert recipes are celebrated for their simplicity, a few clever tricks can elevate your creations from good to absolutely legendary. Think of these as your secret weapons, ensuring every no-bake triumph is as perfect as you envisioned. The beauty of these tips is their universality; they apply whether you’re crafting a chocolate marvel or a vibrant fruit parfait. Paying attention to these small details guarantees that your effort-free desserts not only taste incredible but also look like they were painstakingly prepared by a pastry chef. So, let’s dive into the wisdom that transforms quick treats into unforgettable masterpieces.
The Chilling Truth About Success
The single most crucial step in any no-bake recipe is chilling, and I cannot stress this enough. This isn’t a suggestion; it’s a commandment written in the sacred texts of dessert-making. Adequate chilling time allows all the magical ingredients to firm up, meld their flavors, and become the cohesive, sliceable, or scoopable masterpiece you’re aiming for. Rushing this step is the most common pitfall, leading to a disheartening puddle instead of a pristine slice. Most recipes call for at least 2-4 hours, but often an overnight chill is the true secret to optimal texture and flavor development. Patience, my friends, is the most powerful ingredient in your no-bake arsenal. Clear some fridge space, set a timer, and let nature (and your refrigerator) do its wondrous work. You’ll be rewarded with a dessert that holds its shape and delivers a truly satisfying experience.
Ingredient Intelligence
While simple no bake dessert recipes are forgiving, the quality of your ingredients truly shines through. Since there’s no oven to mask imperfections, every flavor note is pronounced. Opt for high-quality chocolate, fresh cream, ripe fruits, and a good quality alcohol-free vanilla extract. If your recipe calls for a crumb crust, choosing good quality cookies or crackers will make a noticeable difference. For stability in creamy desserts, especially those with fruit, ensure your dairy products are cold when whipped, and if you’re using a gelling agent like agar-agar, measure it precisely. Don’t be afraid to experiment with different extracts or additions like citrus zests to elevate the flavor profile. These quick treats are an excellent canvas for showcasing the best produce and pantry staples you have, so treat them with the respect they deserve, and they will reward you tenfold with incredible taste.
Ingredients for Simple No Bake Dessert Recipes
Here’s what you’ll need to make these delicious treats:
- Graham Cracker CrumbsThese form the sturdy, slightly sweet base for many no-bake bars and cheesecakes, providing a delightful crunch.
- Unsalted ButterEssential for binding the crust together and adding richness; melted, it acts as the glue.
- Cream CheeseThe star of many creamy no-bake desserts, offering a tangy, smooth, and luxurious texture. Ensure it’s softened to room temperature for easy blending.
- Powdered SugarSweetens the creamy layers without adding a grainy texture, dissolving smoothly for a silky finish.
- Peanut ButterAdds a rich, nutty flavor and creamy consistency, perfectly complementing chocolate in many popular no-bake bars. Use a smooth variety for best results.
- Heavy CreamWhipped to stiff peaks, it provides a light, airy texture and richness to fillings and toppings. Make sure it’s very cold for optimal whipping.
- Semi-Sweet Chocolate ChipsUsed for the decadent chocolate topping, melting into a smooth ganache.
- Alcohol-Free Vanilla ExtractEnhances all the other flavors, adding a warm, aromatic depth to the creamy components.
The full ingredients list, including measurements, is provided in the recipe card directly below.
How to Make Simple No Bake Dessert Recipes
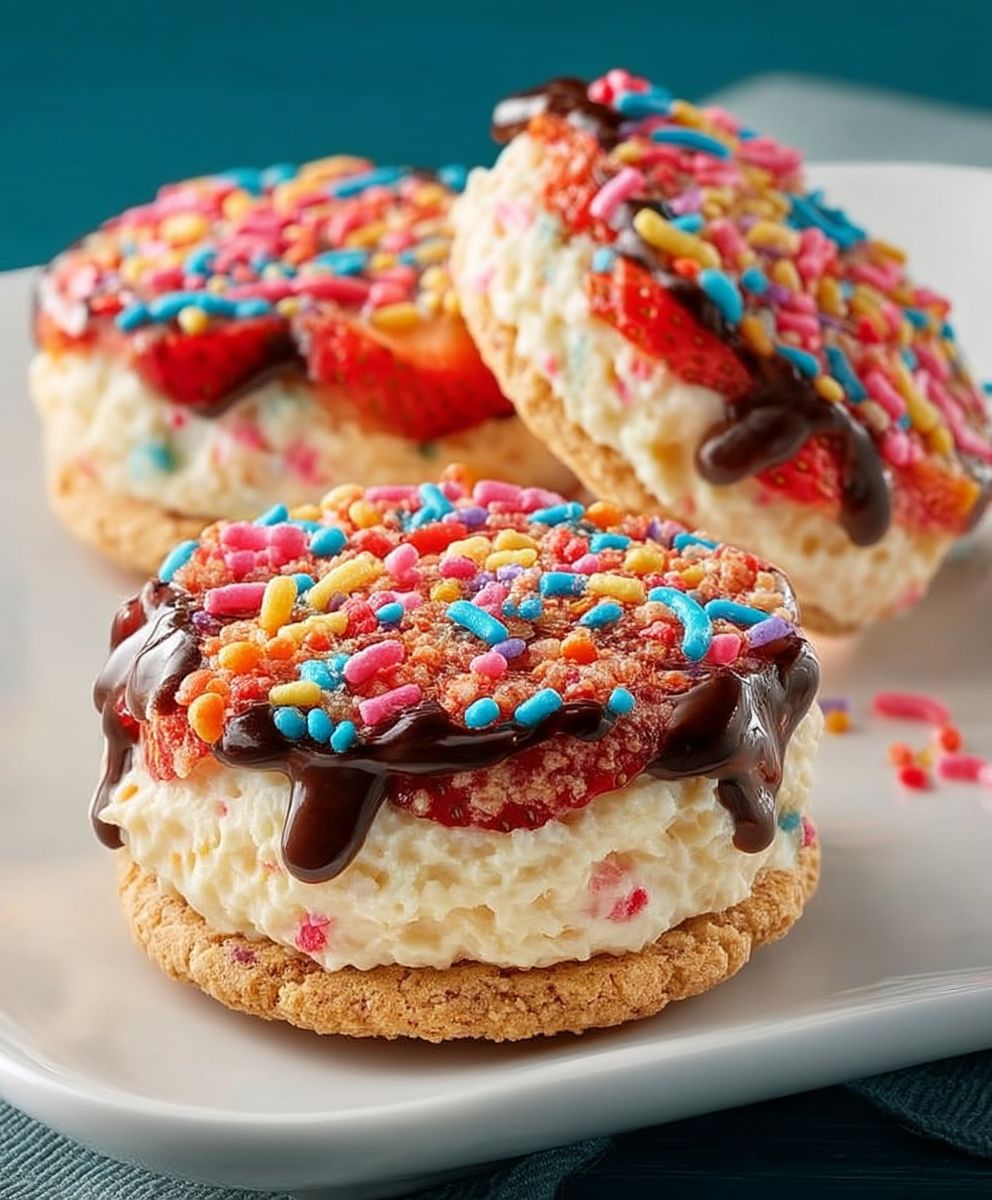
Follow these simple steps to prepare these delicious no-bake dessert bars: Step 1: Prepare the Crumb Crust In a medium bowl, combine 1 ½ cups graham cracker crumbs with ¼ cup granulated sugar and ½ cup melted unsalted butter. Press this mixture firmly into the bottom of an 8×8-inch baking dish lined with parchment paper, extending the paper up two sides to create handles. Use the back of a spoon or a flat-bottomed glass to ensure an even, compact layer. Refrigerate the crust for at least 15 minutes while you prepare the filling. Step 2: Create the Peanut Butter Layer In a large mixing bowl, beat 8 ounces of softened cream cheese with ½ cup powdered sugar until smooth and creamy. Add 1 cup creamy peanut butter and 1 teaspoon alcohol-free vanilla extract, then continue beating until thoroughly combined and fluffy. Spread this peanut butter mixture evenly over the chilled graham cracker crust. Return the dish to the refrigerator. Step 3: Whip the Cream Topping In a separate chilled bowl, whip 1 cup very cold heavy cream with ¼ cup powdered sugar until stiff peaks form. Gently fold about half of the whipped cream into the remaining peanut butter mixture, creating a lighter, airier layer. Spread this carefully over the peanut butter layer in the dish. Save the remaining whipped cream for topping later. Chill the dessert for at least 1 hour. Step 4: Make the Chocolate Ganache In a microwave-safe bowl, combine 1 cup semi-sweet chocolate chips with ¼ cup heavy cream. Microwave in 30-second intervals, stirring after each, until the chocolate is completely melted and smooth. Let the ganache cool slightly for about 5-10 minutes, ensuring it’s still pourable but not hot. Step 5: Assemble and Chill Pour the slightly cooled chocolate ganache evenly over the chilled dessert layers. Using an offset spatula or the back of a spoon, gently spread it to cover the entire surface. Return the dish to the refrigerator and chill for a minimum of 4 hours, or preferably overnight, to allow all layers to set completely. Transfer to plates and drizzle with sauce for the perfect finishing touch.
The Accidental Discovery of Sunshine on a Plate

One scorching summer afternoon, my oven decided to stage a dramatic protest, leaving me dessert-less and grumpy. Amidst a flurry of forgotten ingredients, I stumbled upon the magic of simple no bake dessert recipes. This discovery was a true revelation, tasting like pure sunshine and bringing unexpected joy.
Perfecting the Cooking Process
While “no-bake” implies minimal effort, a specific sequence reigns supreme for efficiency and perfect results. First, gather all your ingredients, then prepare any crust or base layers. Chill these components thoroughly before adding subsequent creamy or fruity layers. This ensures each delicious element sets beautifully, preventing any delightful, albeit messy, collapse.
Add Your Touch
Feel free to get creative with these simple no bake dessert recipes! Swap out chocolate for white chocolate chips, use different types of crushed biscuits, or experiment with various fruit purees. A pinch of cinnamon, a dash of vanilla, or a sprinkle of toasted coconut can elevate flavors wonderfully. Don’t shy away from adding a layer of chopped nuts for extra texture.
Storing & Reheating
Store your finished no-bake desserts in an airtight container in the refrigerator for up to 3-5 days. Most simple no bake dessert recipes are best enjoyed chilled. Reheating isn’t typically necessary or recommended, as it can compromise their delicate texture and melt components. Just grab a spoon and dive right in!
My accidental culinary breakthrough led to a full-blown obsession. I discovered that “no-bake” doesn’t mean “no-effort,” but rather “clever-effort” and “maximum-deliciousness-with-minimal-fuss.” The kitchen, once a battlefield of flour dust and scorching heat, transformed into a cool, calm laboratory of sweet creations. These aren’t just desserts; they are declarations of culinary freedom, perfect for busy weeknights, last-minute gatherings, or when your oven is, like mine was, staging a dramatic protest.
The beauty of simple no bake dessert recipes lies in their versatility. You can whip up something decadent and chocolatey, light and fruity, or even wonderfully tangy and creamy, all without ever turning on the stove. It’s like having a secret superpower in your apron pocket. My friends started calling me the “No-Bake Sorceress,” which, I must admit, I rather enjoyed. They’d show up unannounced, sniffing the air for hints of something sweet and requiring zero baking.
The Speedy Chocolate Peanut Butter Dream Bars
One of the first simple no bake dessert recipes to win over my discerning taste testers (my perpetually hungry family) was the Speedy Chocolate Peanut Butter Dream Bars. Imagine a thick, crumbly base topped with a rich, creamy peanut butter layer, all crowned with a smooth, glossy chocolate ganache. It’s an ode to the classic flavor combination, made effortlessly.
Ingredients for the Dream Bars:
- 1 ½ cups crushed digestive biscuits (or graham crackers)
- ½ cup unsalted butter, melted
- 1 cup creamy peanut butter
- 1 ½ cups powdered sugar
- ¼ cup milk or plant-based milk
- 1 teaspoon alcohol-free vanilla extract
- 1 cup chocolate chips (dairy-free if preferred)
- 2 tablespoons coconut oil
Crafting Your Dream Bars:
First, combine the crushed biscuits with the melted butter. Press this mixture firmly into an 8×8 inch baking dish lined with parchment paper, leaving an overhang to easily lift the bars later. Pop this into the fridge to chill while you prepare the next layer. In a separate bowl, beat the peanut butter, powdered sugar, milk, and alcohol-free vanilla extract until smooth and creamy. Spread this luscious peanut butter mixture evenly over the chilled biscuit base. Return the dish to the refrigerator.
For the glorious chocolate topping, gently melt the chocolate chips with the coconut oil in a microwave-safe bowl or over a double boiler. Stir until completely smooth and glossy. Pour this melted chocolate over the peanut butter layer, spreading it quickly to achieve an even coating. A final trip to the fridge for at least 2 hours, or until fully set, is crucial. Once firm, lift the bars out using the parchment paper, slice them into squares, and prepare for a symphony of flavors. These truly represent the pinnacle of simple no bake dessert recipes.
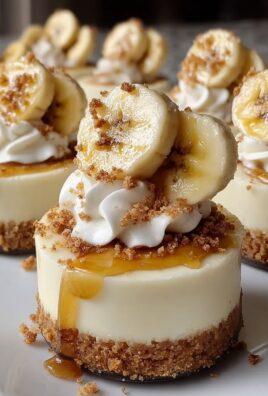
Zesty Lemon Berry Cheesecake Parfaits
Sometimes, you crave something lighter, brighter, and bursting with fresh fruit. That’s where the Zesty Lemon Berry Cheesecake Parfaits come into play. These layered beauties are not only incredibly easy to assemble but also look stunning, making them perfect for entertaining without the stress. They embody the refreshing spirit of simple no bake dessert recipes, proving that elegance doesn’t require an oven.
Ingredients for the Parfaits:
- 8 ounces cream cheese, softened
- ½ cup powdered sugar
- 1 teaspoon lemon zest
- 2 tablespoons fresh lemon juice
- 1 cup heavy cream, whipped to stiff peaks (or dairy-free whipped topping)
- 1 ½ cups mixed fresh berries (strawberries, blueberries, raspberries)
- 1 cup crushed digestive biscuits or graham crackers
Assembling Your Zesty Layers:
In a large bowl, beat the softened cream cheese with the powdered sugar, lemon zest, and lemon juice until the mixture is smooth and free of lumps. Gently fold in the whipped cream, being careful not to deflate it, until everything is just combined. This creates your dreamy, zesty cheesecake filling. Now, grab your favorite serving glasses or jars.
Start by spooning a layer of crushed biscuits into the bottom of each glass. Follow with a generous dollop of the lemon cheesecake mixture, then a layer of mixed fresh berries. Repeat these layers until your glasses are full, finishing with a vibrant cascade of berries on top. Chill these parfaits for at least 30 minutes before serving to allow the flavors to meld and the layers to firm up slightly. They are a testament to how simple no bake dessert recipes can be both easy and incredibly sophisticated.
Fruity Burst Agar-Agar Jellies
For something truly light, refreshing, and entirely different, I often turn to Fruity Burst Agar-Agar Jellies. These vibrant, wobbly delights are a fantastic way to enjoy fresh fruit in a fun, satisfying texture, especially when you want to avoid dairy or heavy creams. They showcase the lighter side of simple no bake dessert recipes, proving healthy can be delicious.
Ingredients for the Jellies:
- 2 cups fruit juice (apple, orange, or berry juice work wonderfully)
- 2 teaspoons agar-agar powder
- 1-2 tablespoons sugar or maple syrup (optional, to taste)
- 1 cup mixed fresh fruit, finely diced (kiwi, mango, grapes, berries)
Creating Your Wobbling Wonders:
In a saucepan, whisk together the fruit juice and agar-agar powder. Let it sit for about 5-10 minutes to allow the agar-agar to hydrate. Bring the mixture to a gentle boil over medium heat, stirring constantly until the agar-agar powder is completely dissolved, usually for about 1-2 minutes. Reduce the heat and stir in the optional sugar or maple syrup until dissolved. Remove from heat.
Evenly distribute the finely diced fresh fruit into small molds or a shallow dish. Carefully pour the hot agar-agar mixture over the fruit. Let it cool slightly at room temperature, then transfer to the refrigerator to chill for at least 1 hour, or until completely set. Once firm, you can unmold the jellies or slice them directly from the dish. These bright, naturally sweet treats are a playful addition to any collection of simple no bake dessert recipes, proving healthy options don’t sacrifice flavor.
Here are a few nuggets of wisdom from my “no-bake adventures” that I’ve collected along the way, helping you perfect your simple no bake dessert recipes with ease:
- Chill Time is Crucial:Never rush the chilling process. Adequate refrigeration ensures your layers set properly, giving you clean cuts and a satisfying texture. Patience pays off here.
- Quality Ingredients Matter:While simple, the fewer ingredients mean their quality shines through. Use good butter, fresh cream cheese, and ripe fruit for the best flavor profiles.
- Embrace the Liners:Always line your pans with parchment paper, leaving an overhang. This simple trick makes removing your finished dessert effortless and keeps your cleanup minimal.
My nephew once declared the chocolate peanut butter bars were “better than birthday cake.” That tiny, sugar-fueled compliment instantly made all my no-bake experiments feel like Nobel-prize worthy achievements, truly connecting with the joy of simple no bake dessert recipes.
Conclusion for Simple No Bake Dessert Recipes
From accidental discoveries to crowd-pleasing creations, embracing simple no bake dessert recipes transforms dessert-making into a joyous, stress-free endeavor. We explored delightful options like the decadent Chocolate Peanut Butter Dream Bars, the refreshing Zesty Lemon Berry Cheesecake Parfaits, and the vibrant Fruity Burst Agar-Agar Jellies. These recipes prove that sophisticated flavors and stunning presentations don’t require an oven or complex techniques. With minimal fuss and maximum flavor, you can whip up impressive treats for any occasion, ensuring your sweet cravings are always met with ease and a smile. Dive into the wonderful world of no-bake desserts and discover your own accidental sunshine on a plate!
Print
Simple No Bake Dessert Recipes
Indulge in a dreamy no-bake delight! This recipe layers buttery graham crust with creamy peanut butter, setting the stage for chocolatey bliss. Easy instructions & nutrition included.
- Total Time: 35 minutes
- Yield: 4 servings 1x
Ingredients
- 1 ½ cups graham cracker crumbs
- ½ cup (1 stick) unsalted butter, melted
- 2 cups powdered sugar
- 1 cup creamy peanut butter
- 1 ½ cups semi-sweet chocolate chips
- ¼ cup heavy cream
- 1 teaspoon vanilla powder
Instructions
- Step 1: Line an 8×8 inch baking pan with parchment paper, leaving an overhang on the sides for easy removal. In a medium bowl, combine the graham cracker crumbs and melted butter, mixing until fully moistened. Press this mixture firmly and evenly into the bottom of the prepared pan. Refrigerate for at least 15 minutes.
- Step 2: In a separate bowl, combine the powdered sugar and creamy peanut butter. Mix with a spoon or electric mixer until thoroughly combined and smooth. Spread this peanut butter mixture evenly over the chilled graham cracker crust. Return the pan to the refrigerator for another 30 minutes to firm up.
- Step 3: For the chocolate topping, combine the semi-sweet chocolate chips and heavy cream in a microwave-safe bowl. Microwave on high in 30-second intervals, stirring well after each, until the chocolate is completely melted and smooth. Stir in the vanilla powder.
- Step 4: Carefully pour the melted chocolate mixture over the chilled peanut butter layer, spreading it evenly to cover the entire surface.
- Step 5: Place the pan back into the refrigerator and chill for at least 2-3 hours, or until the chocolate topping is completely set and firm. Once firm, use the parchment paper overhang to lift the dessert from the pan, slice into squares, and serve cold.
Notes
- Keep your delicious squares fresh by storing them in an airtight container in the refrigerator for up to 5 days, perfect for enjoying later!
- Since this is a chilled no-bake treat, reheating is not recommended; it's designed to be enjoyed cold straight from the fridge for the best texture and flavor.
- For an extra touch of gourmet, sprinkle a tiny pinch of flaky sea salt over the chocolate topping just before it fully sets, or serve squares with a side of fresh raspberries to cut through the richness.
- For perfectly neat slices, warm your knife under hot water and wipe it dry before each cut, ensuring a clean separation through all the delicious layers.
- Prep Time: 15 minutes
- Cook Time: 20 minutes
- Method: Stovetop
- Cuisine: American
Nutrition
- Serving Size: 1 serving (approx. 100g)
- Calories: 380
- Sodium: 210mg
- Fat: 28g
- Saturated Fat: 16g
- Trans Fat: 0.2g
- Protein: 28g

Leave a Comment