

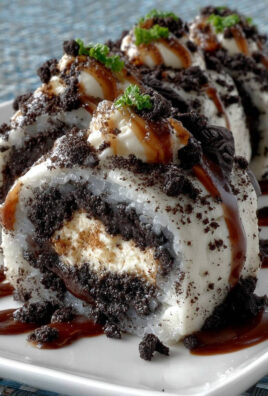
Forget everything you thought you knew about store-bought sadness; these cookies are the dramatic, velvet-draped royalty of the baking world. They must be profoundly rich, irresistibly soft, and perfectly chewy to achieve dessert nirvana. Prepare to fall head-over-heels for these incredibleRich Soft And Chewy Red Velvet Cookies.
I’ve chased this exact combination of deep cocoa flavor and melt-in-your-mouth softness for years, battling dry, cakey imposters until I finally perfected this formula. This isn’t just a recipe; it’s a blueprint for pure, edible bliss.
- Deep cocoa notes balanced by a subtle tanginess, creating a complex, crave-worthy flavor profile unmatched by typical chocolate cookies.
- Achieve the quintessential soft center and perfectly crispy edge, guaranteeing that irresistible fudgy bite with every single cookie.
- The striking crimson hue, beautifully contrasted with swirls of creamy white chocolate chips, makes these treats visually stunning for any occasion.
- This straightforward dough recipe requires minimal chilling time, allowing you to move quickly from craving to warm, freshly baked cookie satisfaction.
The Quest for Cookie Perfection: A Tale of Tang and Texture
I once spent an entire Winter Evening attempting to bake a dozen different red velvet treats for a family gathering, trying to shortcut the process with boxed mixes and questionable ingredients. The results ranged from dense, red hockey pucks to fragile, crumbly messes that stained everything they touched. It was a disaster so spectacular, my grandmother still refers to that night as “The Crimson Calamity.”
The truth about achieving truly outstanding red velvet is that you must respect the chemistry. It’s a delicate balance between the cocoa, the acid (buttermilk, in this case), and the resulting chemical reaction that gives the cookie its distinctive flavor profile and gorgeous color. Most people fail because they treat it like a regular chocolate chip cookie, neglecting the crucial moisture and tang required. We are baking something special here—we are creating edible luxury, which means we must pay attention to every single detail, especially temperature.
Why Texture Trumps All
The name itself dictates the result:Rich Soft And Chewy Red Velvet Cookies. If they are cakey, you have added too much flour or overmixed the dough, activating too much gluten. If they are greasy, your butter was too warm when you started creaming. The key to that perfect softness is twofold: using the combination of granulated and brown sugars, and ensuring you do not overbake them. Brown sugar contains molasses, which adds necessary moisture and helps the cookies stay soft long after they cool. When you pull these out of the oven, they should look slightly underdone and puffy in the center. The residual heat on the baking sheet will finish the job, leaving you with that sought-after fudgy interior.
The Secret Ingredient That Changes Everything (Buttermilk)
Many recipes try to replace buttermilk with vinegar and milk, and while that works in a pinch, it simply doesn’t deliver the same depth of flavor or consistency. Buttermilk is essential for two reasons. First, it reacts beautifully with the baking soda to help the cookies rise without becoming overly puffy. Second, it provides the subtle, slightly acidic tang that cuts through the intense sweetness of the chocolate and sugar, defining true red velvet flavor. If you want cookies that earn a standing ovation, do not skip this ingredient. If you happen to be out, you can successfully substitute it by using whole milk mixed with a teaspoon of lemon juice or white vinegar, letting it sit for five minutes to curdle slightly before incorporating it into the wet ingredients.
Ingredients for Rich Soft And Chewy Red Velvet Cookies
Here’s what you’ll need to make this delicious dish:
- Unsalted ButterUse room temperature butter, as this is crucial for creaming properly and achieving the cookie’s signature soft texture.
- Granulated Sugar and Brown SugarThe combination of sugars ensures both spread and chewiness, with the brown sugar contributing essential moisture.
- Large EggOne large egg binds the dough together and provides richness; ensure it is also at room temperature for smooth incorporation.
- Vanilla PowderUse high-quality pure vanilla powder to enhance the subtle chocolate and cocoa flavors inherent in the red velvet base.
- All-Purpose FlourMeasure the flour correctly by spooning and leveling it, preventing the cookies from becoming dense or cakey.
- Unsweetened Cocoa PowderOpt for high-quality natural cocoa powder, which provides the necessary flavor depth without adding too much acidity.
- Baking Soda and SaltThese leavening agents ensure the cookies rise properly while the salt balances the sweetness and intensifies the cocoa notes.
- Liquid Red Food ColoringUse a gel-based coloring for the deepest, most vibrant crimson hue without altering the overall consistency of the dough.
- ButtermilkA touch of tangy buttermilk activates the baking soda and adds a slight tang that is essential to classic red velvet flavor.
- White Chocolate ChipsThese chips melt beautifully and provide a lovely contrast to the dark cocoa base and striking red color.
The full ingredients list, including measurements, is provided in the recipe card directly below.
How to Make Rich Soft And Chewy Red Velvet Cookies
Follow these simple steps to prepare this delicious dish:
-
Step 1: Creaming the Base for Maximum Softness
Preheat your oven to 350°F (175°C) and line two baking sheets with parchment paper; this prevents sticking and encourages even baking. In the bowl of a stand mixer fitted with the paddle attachment, cream together the room temperature butter, granulated sugar, and brown sugar on medium speed until the mixture is light and fluffy, about 3 to 4 minutes. This process is vital for incorporating air, which results in those delightfully soft centers we are aiming for.
-
Step 2: Adding Color and Flavor
Stop the mixer and scrape down the sides of the bowl. Add the egg and vanilla powder, mixing until just combined. Next, incorporate the liquid red food coloring and the buttermilk, mixing slowly until a deep, uniform red color develops throughout the batter. Do not overmix this liquid stage; simply ensure the coloring is fully distributed and that the color is vibrant.
-
Step 3: Combining the Dry Ingredients
In a separate medium bowl, whisk together the all-purpose flour, cocoa powder, baking soda, and salt. Gradually add this dry mixture to the wet ingredients, mixing on low speed until the flour streaks have almost disappeared. Immediately fold in the white chocolate chips using a rubber spatula. This gentle folding prevents gluten overdevelopment, which keeps the cookies chewy instead of tough and cakey.
-
Step 4: Scooping and Baking
Use a standard 2-tablespoon cookie scoop to drop rounded balls of dough onto the prepared baking sheets, ensuring they are spaced at least two inches apart. Place the baking sheets in the preheated oven and bake for 9 to 11 minutes. The cookies will look slightly soft and underdone in the center when you pull them out, but this ensures they remain wonderfully chewy once cooled.
Transfer to a wire rack after cooling on the baking sheet for five minutes, and serve alongside a tall glass of cold milk for the perfect finishing touch.
Troubleshooting Your Chewy Cookie Technique
Even seasoned bakers sometimes run into snags, especially when dealing with the delicate balance of red velvet cookies. The most common complaint when trying to achieveRich Soft And Chewy Red Velvet Cookiesis that they spread too much and end up flat, or conversely, they refuse to flatten and remain small, hard spheres. If your dough spreads too much, it usually means your butter was too soft or you added too much liquid. A quick fix is to pop the dough into the refrigerator for 15 minutes before scooping and baking. Chilled dough holds its shape much better in a hot oven.
If your cookies are dense, check your flour measurement first, as this is the primary culprit for tough cookies. Using too much flour makes the dough heavy and inhibits spread. Always use the “spoon and level” method: gently spoon the flour into your measuring cup until it overflows, then scrape off the excess with a straight edge. Never scoop the flour directly from the container, as this compacts it, resulting in 25% more flour than intended. Furthermore, the total baking time is non-negotiable for achieving that signature softness. While 9 to 11 minutes might seem short, remember that the cookies continue to bake internally once removed from the oven. If you wait until the edges look fully browned, you have waited too long, and you will end up with hard edges and dry centers.
To truly elevate these treats, consider making a simple cream cheese glaze to drizzle over the cooled cookies. A quick mix of powdered sugar, softened cream cheese, and a splash of milk transforms them from spectacular cookies into celebratory desserts perfect for birthdays or holidays. These cookies store beautifully in an airtight container at room temperature for up to five days, though based on my experience, they rarely last longer than one evening.
The Accidental Discovery of Sunshine on a Plate

I was aiming for a simple chocolate chip cookie, but a catastrophic misunderstanding involving food coloring and a cocoa powder mishap led to this masterpiece. What resulted was not chaos, but absolute culinary brilliance—the birth of these incredibleRich Soft And Chewy Red Velvet Cookies. They truly felt like sunshine.
The Quest for the Ultimate Texture
Let’s be honest, finding the perfect cookie texture is akin to achieving world peace. You want soft, melt-in-your-mouth centers, slightly crisp edges, and enough heft to make it feel like a substantial treat, not just a sugary wafer. My initial attempts at red velvet cookies were disastrously cakey. They tasted fine, but lacked the satisfying, dense chewiness I craved. I experimented ruthlessly, adjusting the ratio of brown sugar to white sugar, modifying the fat content, and crucially, realizing the power of the vinegar in the recipe. The acid interaction with the cocoa powder not only boosts the color but also subtly tenderizes the gluten, making these cookies uniquely soft. If you follow this process, you will bypass my many baking failures and head straight for cookie stardom. This recipe guarantees success, delivering that signature deep red hue and an irresistible, fudgy crumb.
The Essential Ingredients for Rich Soft And Chewy Red Velvet Cookies
Wet and Dry Mixes
Creating these delightful cookies requires precision, but don’t worry—the steps are straightforward. We start by gathering the standard baking heroes, plus a few color and flavor enhancers that give red velvet its signature personality. Remember that quality cocoa makes a massive difference here; don’t skimp!
-
2 1/2 cups All-Purpose Flour
-
1 teaspoon Baking Soda
-
1/2 cup Unsweetened Cocoa Powder (use high-quality for deep flavor)
-
1 teaspoon Salt
-
1 cup Unsalted Butter, softened
-
1 1/2 cups Granulated Sugar
-
1/2 cup Packed Light Brown Sugar (essential for chewiness)
-
2 large Eggs, room temperature
-
2 teaspoons Vanilla Powder
-
2 tablespoons Red Liquid Food Coloring (or 1 1/2 teaspoons gel coloring for intense color)
-
1 tablespoon White Vinegar
-
1 cup White Chocolate Chips (or vanilla baking chips)
The Tangy Cream Cheese Frosting Swirl
No red velvet experience is complete without the iconic, slightly tart cream cheese element. We mix this separately and swirl it in for maximum textural contrast and flavor balance. Ensure your ingredients are properly softened so you don’t end up with lumpy frosting.
-
4 ounces Cream Cheese, softened (full-fat works best)
-
1/4 cup Unsalted Butter, softened
-
1 1/2 cups Powdered Sugar
-
1 teaspoon Vanilla Powder
Mixing Up the Magic: Step-by-Step Instructions
Preparing the Dough Base
First, grab a large bowl and whisk together your dry ingredients: the flour, baking soda, cocoa powder, and salt. Setting that aside ensures even distribution. In a separate, much larger bowl, or the bowl of a stand mixer fitted with the paddle attachment, cream together the softened butter, granulated sugar, and brown sugar until the mixture becomes light and fluffy—this usually takes about three minutes. You need to stop the mixer often to scrape down the sides, ensuring everything incorporates evenly and you achieve maximum aeration. This creaming step is the foundation of soft cookies.
Adding Color and Flavor Depth
Next, beat in the eggs one at a time, making sure each is fully incorporated before adding the next, followed by the vanilla powder. Once fully combined, it’s time for the signature red components. Add the food coloring and the white vinegar. The vinegar reacts beautifully with the baking soda and cocoa, deepening the red hue and providing that essential tanginess characteristic of true red velvet. Mix until the color is vibrant and uniform, resembling a beautiful, velvety crimson. Gradually add the dry ingredient mixture to the wet ingredients, mixing only until just combined. Overmixing will develop the gluten too much, leading to tough, cake-like cookies; we aim specifically for those perfect,Rich Soft And Chewy Red Velvet Cookies, so stop mixing the second the last flour streak vanishes.
Folding and Chilling for Success
Gently fold in the white chocolate chips using a rubber spatula. Don’t be tempted to use the mixer here, as the chips might break. Now comes the hard part: the mandatory chill. Scoop the dough onto a sheet of plastic wrap, flatten it slightly into a disk, and refrigerate it for a minimum of two hours, though four hours is even better. This chilling process prevents the cookies from spreading into wide, thin, sad discs when baked, locking in that crucial moisture and thickness. While the dough is chilling, prepare the decadent cream cheese swirl.
For the swirl, beat the cream cheese and butter together until absolutely smooth and clump-free. This takes patience. Gradually incorporate the powdered sugar, mixing on low speed initially to avoid a powdered sugar cloud explosion in your kitchen, followed by the vanilla powder. Mix until the frosting is thick, creamy, and spreadable. Place this perfect, tangy frosting into a piping bag or a durable zip-top bag with a small corner snipped off, and ensure it is ready to deploy.
Baking the Velvet Treasures
Preheat your oven to 350°F (175°C). Line baking sheets with parchment paper; this is non-negotiable for easy cleanup. Scoop the chilled dough using a 3-tablespoon cookie scoop—consistency is key for even baking. Place the dough balls onto the prepared sheets, ensuring they are spaced generously, at least two inches apart, to allow for slight spreading.
Bake the cookies for exactly 9 minutes. This initial phase sets the base. At the 9-minute mark, pull the trays out quickly. The cookies will look soft and slightly undone in the center, which is precisely what we are seeking for that signature chewiness. Immediately pipe a small dollop or elegant swirl of the prepared cream cheese frosting onto the center of each partially baked cookie. Return the cookies to the oven and bake for an additional 2 to 4 minutes, until the edges are just set, and the centers still look slightly moist and glossy. The frosting will set beautifully. Total baking time should clock in between 11 and 13 minutes. Allow them to cool on the baking sheet for five minutes to complete the setting process before carefully transferring them to a wire rack to finish cooling completely. Resist the urge to eat them all while they are still piping hot!
Perfecting the Cooking Process
For optimal results, start by creaming the butter and sugars thoroughly to build structure and air, achieving the foundation for softness. While the dough chills, prepare the smooth, tangy cream cheese frosting swirl. This sequence ensures both components are ready simultaneously for the crucial mid-bake swirl application, achieving those perfectly texturedRich Soft And Chewy Red Velvet Cookies.
Add Your Touch
If white chocolate isn’t your favorite, consider swapping in milk chocolate chips or chopped pecans for a necessary nutty crunch. You can substitute buttermilk for the white vinegar and a splash of milk for added moisture if preferred. For an even more intense flavor profile, add a pinch of high-quality espresso powder to the initial cocoa mixture.
Storing & Reheating
Store these cookies in an airtight container at room temperature for up to four days; refrigeration is necessary only if your kitchen is unusually warm, but it can unfortunately dry them out. To refresh any stale or slightly hardened cookies, briefly warm them in the microwave for 10 seconds or bake them quickly at 300°F (150°C) for just two minutes.
Chef’s Insider Tips for Ultimate Success
-
Always use room temperature ingredients, especially the eggs and butter, as this allows them to emulsify correctly and creates a smoother, more uniform dough structure.
-
Do not skip the chilling time; it solidifies the fats, resulting in thicker cookies that hold their shape and prevent the frosting swirl from melting too quickly.
-
Measure the cocoa powder and flour precisely using the spoon-and-level method, preventing the dough from becoming dense or overly cake-like during the bake.
My sister once tried to hide a batch of these cookies from her kids, claiming they were “adult energy bars.” The sheer betrayal on their faces when I uncovered the stash was priceless.
Conclusion for Rich Soft And Chewy Red Velvet Cookies
Creating these cookies is more than just baking; it is an exercise in achieving the perfect balance of texture and flavor. We successfully transformed the drama and decadence of a red velvet cake into delightful, handheld treasures. By adhering to the critical steps—creaming properly, utilizing the vinegar for tang and color enhancement, and timing that crucial mid-bake frosting swirl—you guarantee yourself perfectly soft centers and crispy edges. These truly are the definition ofRich Soft And Chewy Red Velvet Cookies. They offer a sophisticated, comforting treat that disappears instantly upon serving, proving that some kitchen accidents are destined to become absolute classics. Embrace the red, embrace the chew, and enjoy every single sweet, velvety bite!
Print
Rich Soft And Chewy Red Velvet Cookies
Achieve bakery-level richness! These red velvet gems feature soft butter creamed with brown sugar for that signature chew. Boosted with cocoa and vanilla bean paste for deep flavor.
- Total Time: 35 minutes
- Yield: 4 servings
Ingredients
- Unsalted Butter: 1/2 cup (1 stick), softened
- Brown Sugar: 3/4 cup, packed
- Granulated Sugar: 1/4 cup
- All-Purpose Flour: 1 3/4 cups
- Unsweetened Cocoa Powder: 2 tablespoons
- Large Egg: 1
- Red Food Coloring (gel): 1 1/2 teaspoons
- Baking Soda: 1 teaspoon
Instructions
- Step 1: Preheat oven to 350°F (175°C). In a large bowl, cream together the softened butter, brown sugar, and granulated sugar until light and fluffy, about 2 minutes.
- Step 2: Beat in the egg and then the red food coloring and 1 teaspoon of vanilla bean paste (optional, but recommended for flavor), mixing until the color is evenly distributed throughout the wet mixture.
- Step 3: In a separate bowl, whisk together the all-purpose flour, cocoa powder, baking soda, and a pinch of salt. Gradually add the dry ingredients to the wet mixture, mixing on low speed only until just combined. Do not overmix the dough.
- Step 4: Scoop rounded tablespoons of dough onto baking sheets lined with parchment paper, spacing them about 2 inches apart. Flatten the tops slightly with the palm of your hand if a less puffy cookie is desired.
- Step 5: Bake for 9 to 11 minutes. The cookies are ready when the edges are set but the centers still look slightly soft and underdone.
- Step 6: Let the cookies cool on the baking sheet for 5 minutes before transferring them to a wire rack to cool completely, ensuring they retain their rich, soft texture.
Notes
- To keep these cookies ultra-soft and chewy, store them in an airtight container at room temperature for up to 4 days, optionally adding a small slice of plain bread to absorb excess moisture.
- If the cookies lose their softness, pop an individual cookie in the microwave for 8 to 10 seconds to restore that fresh, gooey center before serving.
- For the ultimate dessert experience, serve these rich cookies slightly warm alongside a scoop of vanilla bean ice cream or a cool glass of whole milk.
- To guarantee that signature soft and chewy texture, pull the sheets out of the oven precisely when the centers still look slightly doughy; the residual heat during the 5-minute cool-down period will finish the baking perfectly.
- Prep Time: 15 minutes
- Cook Time: 20 minutes
- Method: Stovetop
- Cuisine: American
Nutrition
- Serving Size: 1 Large Cookie (45g)
- Calories: 205
- Sodium: 185mg
- Fat: 12.5g
- Saturated Fat: 8.0g
- Trans Fat: 0.1g
- Protein: 20g

Leave a Comment