
Homemade Peppermint Sticks: A Sweet Holiday Tradition
Homemade Peppermint Sticks are not just a delightful treat; they are a cherished holiday tradition that brings warmth and joy to any festive gathering. As the aroma of peppermint fills the air, it evokes memories of cozy family moments and cheerful celebrations. This classic candy has a rich history, dating back to the 18th century, when peppermint was first used in confections to create a refreshing flavor that has stood the test of time.
People love Homemade Peppermint Sticks for their perfect balance of sweetness and minty freshness. The satisfying crunch of the candy combined with its smooth texture makes it an irresistible indulgence. Plus, making these treats at home allows you to customize the flavor and presentation, making them a wonderful gift for friends and family. Whether you’re enjoying them by the fireplace or using them to decorate holiday desserts, Homemade Peppermint Sticks are sure to bring a smile to everyone’s face. Join me as we dive into this delightful recipe that will fill your home with the spirit of the season!
Ingredients:
- 2 cups granulated sugar
- 1/2 cup light corn syrup
- 1/2 cup water
- 1/4 teaspoon salt
- 1 teaspoon peppermint extract
- Red food coloring (optional)
- Powdered sugar (for dusting)
Preparing the Candy Mixture
- In a medium-sized saucepan, combine the granulated sugar, light corn syrup, water, and salt. Stir the mixture gently to combine the ingredients.
- Place the saucepan over medium heat and cook the mixture, stirring occasionally, until the sugar has completely dissolved. This should take about 5 minutes.
- Once the sugar has dissolved, stop stirring and allow the mixture to come to a boil. Use a candy thermometer to monitor the temperature. You want to heat the mixture until it reaches 300°F (hard crack stage).
- As the mixture heats, keep an eye on it to prevent burning. If you notice any sugar crystals forming on the sides of the pan, you can use a wet pastry brush to wash them down.
Flavoring and Coloring the Candy
- Once the candy mixture reaches 300°F, remove it from the heat immediately. Be cautious, as the mixture will be extremely hot.
- Allow the bubbling to subside for a moment, then add the peppermint extract. Stir quickly to incorporate the flavor.
- If you want to create a classic peppermint stick look, divide the mixture in half. Leave one half clear and add a few drops of red food coloring to the other half. Stir gently to create a marbled effect, but do not overmix.
Shaping the Peppermint Sticks
- Prepare a clean, flat surface by dusting it with powdered sugar to prevent sticking. You can also use a silicone baking mat for easier handling.
- Pour the clear candy mixture onto one side of the prepared surface and the red mixture onto the other side. Allow the candy to cool for about 5 minutes, or until it is cool enough to handle but still pliable.
- Once the candy is cool enough, use a bench scraper or your hands to knead each color separately for about 1-2 minutes. This will help to develop the texture and make it easier to shape.
- After kneading, roll each color into long ropes, about 1/2 inch in diameter. You can use your hands or a rolling pin to achieve the desired thickness.
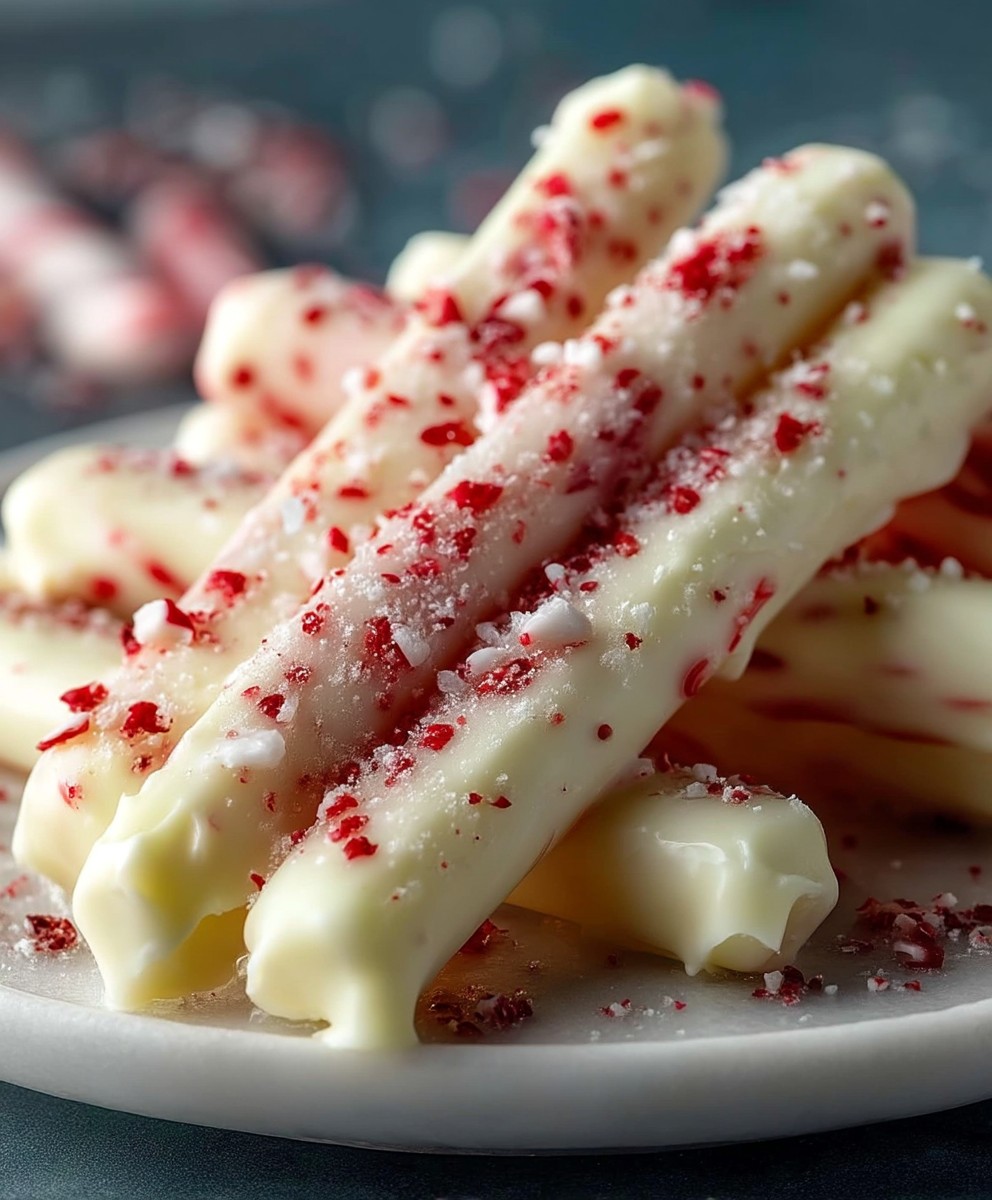
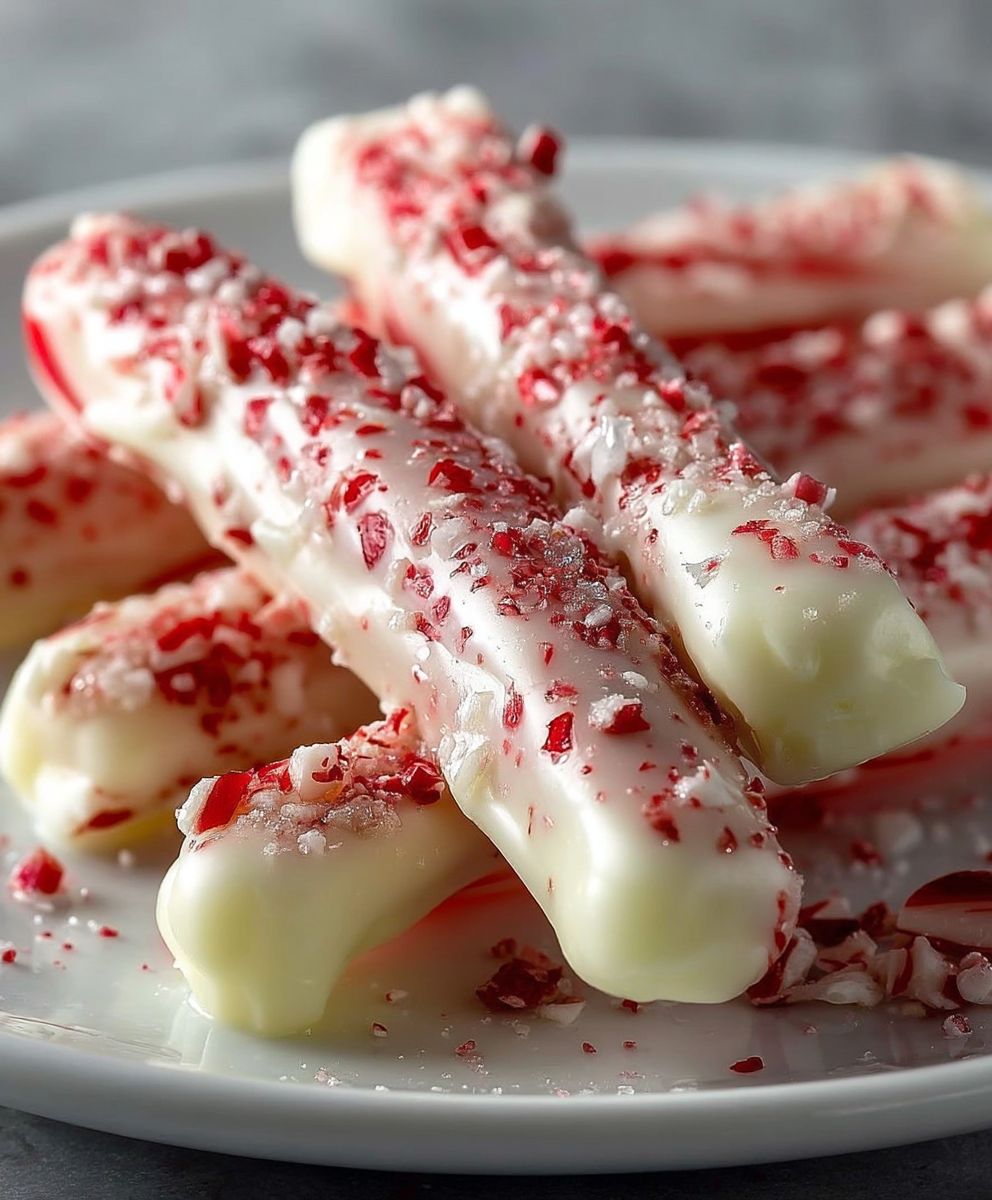
- Once you have your ropes, twist them together to create a marbled effect. Then, cut the twisted rope into 4-6 inch pieces to form individual peppermint sticks.
Cooling and Storing the Peppermint Sticks
- Place the cut peppermint sticks on a baking sheet lined with parchment paper or a silicone mat. Allow them to cool completely at room temperature for about 1-2 hours.
- Once cooled, dust the peppermint sticks with powdered sugar to prevent them from sticking together.
- Store the peppermint sticks in an airtight container at room temperature. They can last for several weeks, making them perfect for holiday gifting or enjoying throughout the winter season.
Tips for Success
- Make sure to use a reliable candy thermometer for accurate temperature readings.
- Be cautious when handling hot sugar mixtures, as they can cause severe burns.
- If you prefer a stronger peppermint flavor, you can increase the amount of peppermint extract slightly, but be careful not to overpower the candy.
- Experiment with different colors or even flavors by using other extracts, such as vanilla or almond, for a unique twist on the classic peppermint stick.
Serving Suggestions
- These homemade peppermint sticks make a delightful addition to holiday gift baskets.
- Crush them and use as a topping for hot chocolate or ice cream.
- They can also be used as festive decorations for cakes and cupcakes.
Final Thoughts
Making homemade peppermint sticks is a fun and rewarding process that brings
Conclusion:
If you’re looking for a delightful treat that captures the essence of the holiday season, then these homemade peppermint sticks are an absolute must-try! Not only do they offer a refreshing burst of minty flavor, but they also provide a fun and engaging way to spend time in the kitchen. The process of making these peppermint sticks is simple and rewarding, allowing you to create a festive treat that’s perfect for sharing with family and friends.
One of the best things about homemade peppermint sticks is their versatility. You can enjoy them as they are, or you can get creative with your serving suggestions. For a delightful twist, consider drizzling some melted chocolate over the sticks for an indulgent treat that combines the coolness of peppermint with the richness of chocolate. You could also crush some of the sticks and sprinkle them over ice cream or hot cocoa for an extra festive touch. If you’re feeling adventurous, try adding a splash of food coloring to the peppermint mixture to create colorful swirls that will impress your guests.
Don’t forget that these peppermint sticks make for fantastic gifts during the holiday season! Package them in a decorative box or jar, and you’ll have a thoughtful, homemade present that anyone would love to receive. They’re perfect for holiday parties, as a sweet addition to dessert tables, or simply as a treat to enjoy while cozying up with a good book or movie.
I encourage you to give this recipe a try and experience the joy of making your own homemade peppermint sticks. It’s a wonderful way to bring a little holiday cheer into your home, and I promise you won’t be disappointed with the results. Once you’ve made them, I’d love to hear about your experience! Share your thoughts, variations, or any creative twists you added to the recipe. Your feedback not only inspires me but also helps others in our community discover the joy of making these delightful treats.
So, roll up your sleeves, gather your ingredients, and let’s get started on creating some delicious homemade peppermint sticks that will surely become a cherished tradition in your household. Happy cooking, and I can’t wait to see how your peppermint sticks turn out!
Homemade Peppermint Sticks: A Simple Recipe for Festive Treats
Enjoy the festive season with these easy-to-make homemade peppermint sticks! Perfect for holiday gifting or winter treats, these customizable sweets combine sugar, corn syrup, and peppermint extract for a delightful flavor. Add a splash of color for a fun twist, and dust with powdered sugar to keep them from sticking.
Ingredients
- 2 cups granulated sugar
- 1/2 cup light corn syrup
- 1/2 cup water
- 1/4 teaspoon salt
- 1 teaspoon peppermint extract
- Red food coloring (optional)
- Powdered sugar (for dusting)
Instructions
- In a medium-sized saucepan, combine the granulated sugar, light corn syrup, water, and salt. Stir gently to combine.
- Place the saucepan over medium heat and cook, stirring occasionally, until the sugar has completely dissolved (about 5 minutes).
- Once dissolved, stop stirring and allow the mixture to boil. Use a candy thermometer to monitor the temperature, heating until it reaches 300°F (hard crack stage).
- Watch for any sugar crystals forming on the sides of the pan; if you see them, use a wet pastry brush to wash them down.
- When the mixture reaches 300°F, remove it from heat immediately. Be cautious, as it will be extremely hot.
- Allow the bubbling to subside, then add the peppermint extract and stir quickly to incorporate.
- For a classic peppermint stick look, divide the mixture in half. Leave one half clear and add a few drops of red food coloring to the other half. Stir gently to create a marbled effect without overmixing.
- Dust a clean, flat surface with powdered sugar to prevent sticking, or use a silicone baking mat.
- Pour the clear candy mixture onto one side and the red mixture onto the other. Let cool for about 5 minutes, until cool enough to handle but still pliable.
- Knead each color separately for 1-2 minutes to develop texture.
- Roll each color into long ropes, about 1/2 inch in diameter.
- Twist the ropes together to create a marbled effect, then cut into 4-6 inch pieces to form individual peppermint sticks.
- Place the cut peppermint sticks on a baking sheet lined with parchment paper or a silicone mat. Allow to cool completely at room temperature for 1-2 hours.
- Once cooled, dust with powdered sugar to prevent sticking.
- Store in an airtight container at room temperature for several weeks.
Notes
- Use a reliable candy thermometer for accurate temperature readings.
- Be cautious when handling hot sugar mixtures to avoid burns.
- Adjust the peppermint extract for a stronger flavor, but avoid overpowering the candy.
- Experiment with different colors or flavors using other extracts for a unique twist.
Leave a Comment