
Country Fried Chicken: A Comfort Food Classic
Country Fried Chicken is more than just a dish; it’s a beloved tradition that brings families together around the dinner table. This crispy, golden-brown delight has its roots in Southern cuisine, where it has been a staple for generations. The history of Country Fried Chicken is rich, often associated with family gatherings and Sunday dinners, making it a dish that evokes nostalgia and warmth.
What makes Country Fried Chicken so irresistible? It’s the perfect combination of crunchy texture and juicy, tender meat that keeps everyone coming back for seconds. The savory seasoning and the satisfying crunch create a symphony of flavors that dance on your palate. Plus, it’s incredibly convenient to prepare, making it an ideal choice for busy weeknights or special occasions alike. Whether served with creamy mashed potatoes or a side of coleslaw, Country Fried Chicken is sure to please even the pickiest eaters.
Join me as we dive into this delightful recipe that captures the essence of comfort food at its finest. You’ll soon discover why Country Fried Chicken holds a special place in the hearts of many!
Ingredients:
- 4 large chicken breasts (boneless and skinless)
- 1 cup buttermilk
- 1 teaspoon hot sauce (optional)
- 1 cup all-purpose flour
- 1 teaspoon garlic powder
- 1 teaspoon onion powder
- 1 teaspoon paprika
- 1 teaspoon salt
- 1/2 teaspoon black pepper
- 1/2 teaspoon cayenne pepper (optional for extra heat)
- Vegetable oil (for frying)
Preparing the Chicken
- Start by preparing the chicken breasts. If they are thick, I like to pound them to an even thickness of about 1 inch. This ensures they cook evenly and stay juicy.
- In a large bowl, combine the buttermilk and hot sauce (if using). Whisk them together until well blended.
- Add the chicken breasts to the buttermilk mixture, making sure they are fully submerged. Cover the bowl with plastic wrap and refrigerate for at least 1 hour, or up to overnight. This marinating process helps to tenderize the chicken and infuse it with flavor.
Preparing the Coating
- While the chicken is marinating, I prepare the coating. In a separate bowl, combine the flour, garlic powder, onion powder, paprika, salt, black pepper, and cayenne pepper (if using). Mix well to ensure all the spices are evenly distributed.
- Set up a dredging station: Place the bowl of seasoned flour next to the bowl of buttermilk-marinated chicken. I also like to have a large plate or baking sheet ready to hold the coated chicken.
Dredging the Chicken
- Once the chicken has marinated, remove each piece from the buttermilk, allowing any excess to drip off.
- Carefully dredge each chicken breast in the seasoned flour mixture, pressing down gently to ensure an even coating. Make sure to cover all sides thoroughly.
- Place the coated chicken on the prepared plate or baking sheet. Repeat this process for all the chicken breasts.
Cooking Process
- In a large, heavy skillet or cast-iron pan, pour in enough vegetable oil to cover the bottom of the pan by about 1/2 inch. Heat the oil over medium-high heat until it reaches 350°F (175°C). You can test the oil by dropping a small pinch of flour into it; if it sizzles, the oil is ready.
- Carefully add the coated chicken breasts to the hot oil, making sure not to overcrowd the pan. I usually fry 2-3 pieces at a time, depending on the size of my skillet.
- Fry the chicken for about 5-7 minutes on one side, or until it turns a beautiful golden brown. I like to use tongs to gently lift a piece and check the color.
- Once golden brown, flip the chicken over and continue frying for another 5-7 minutes on the other side. The internal temperature should reach 165°F (75°C) for safe consumption.
- Once cooked, remove the chicken from the skillet and place it on a wire rack or a plate lined with paper towels to drain any excess oil. This helps keep the coating crispy.
Assembling and Serving
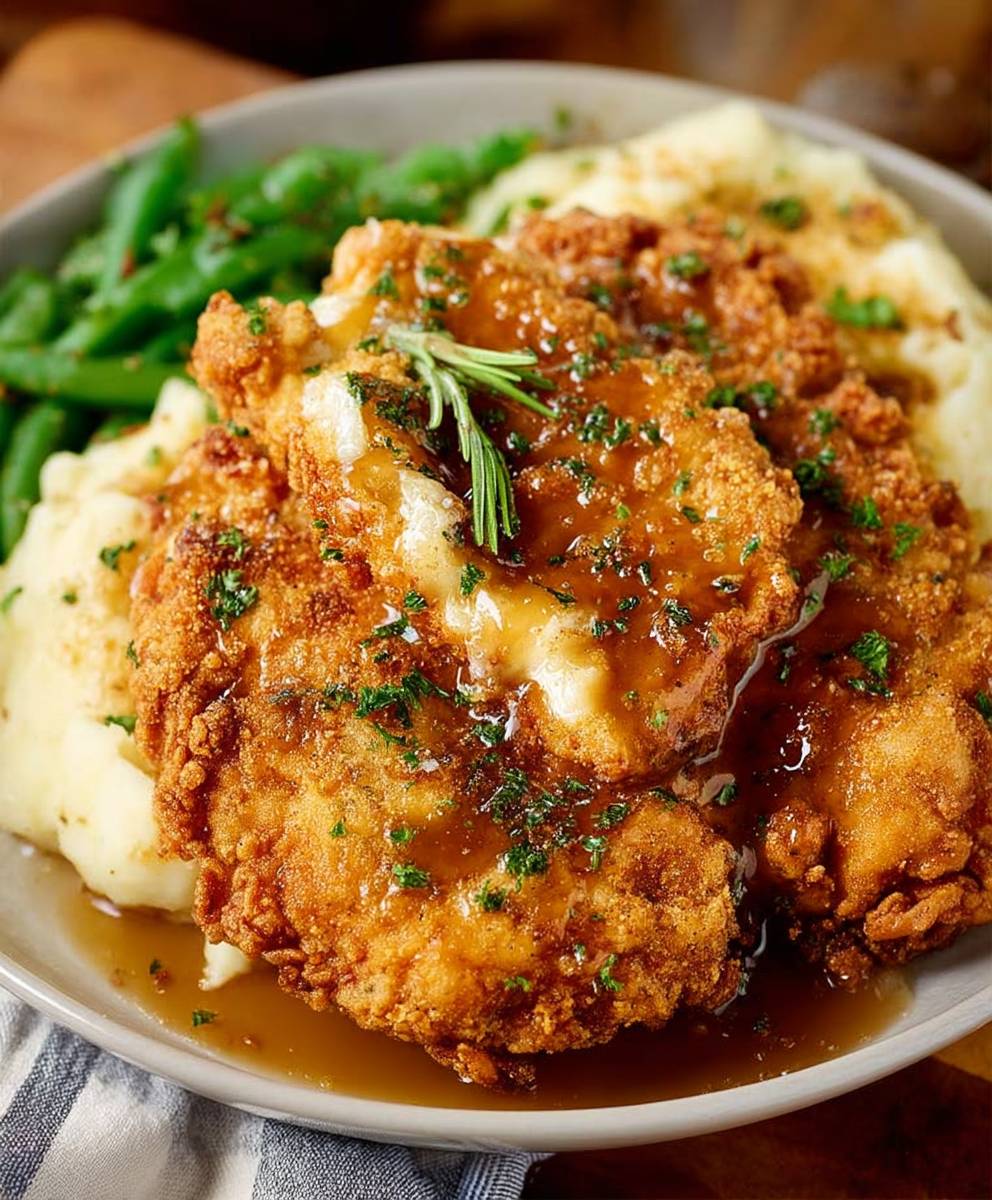
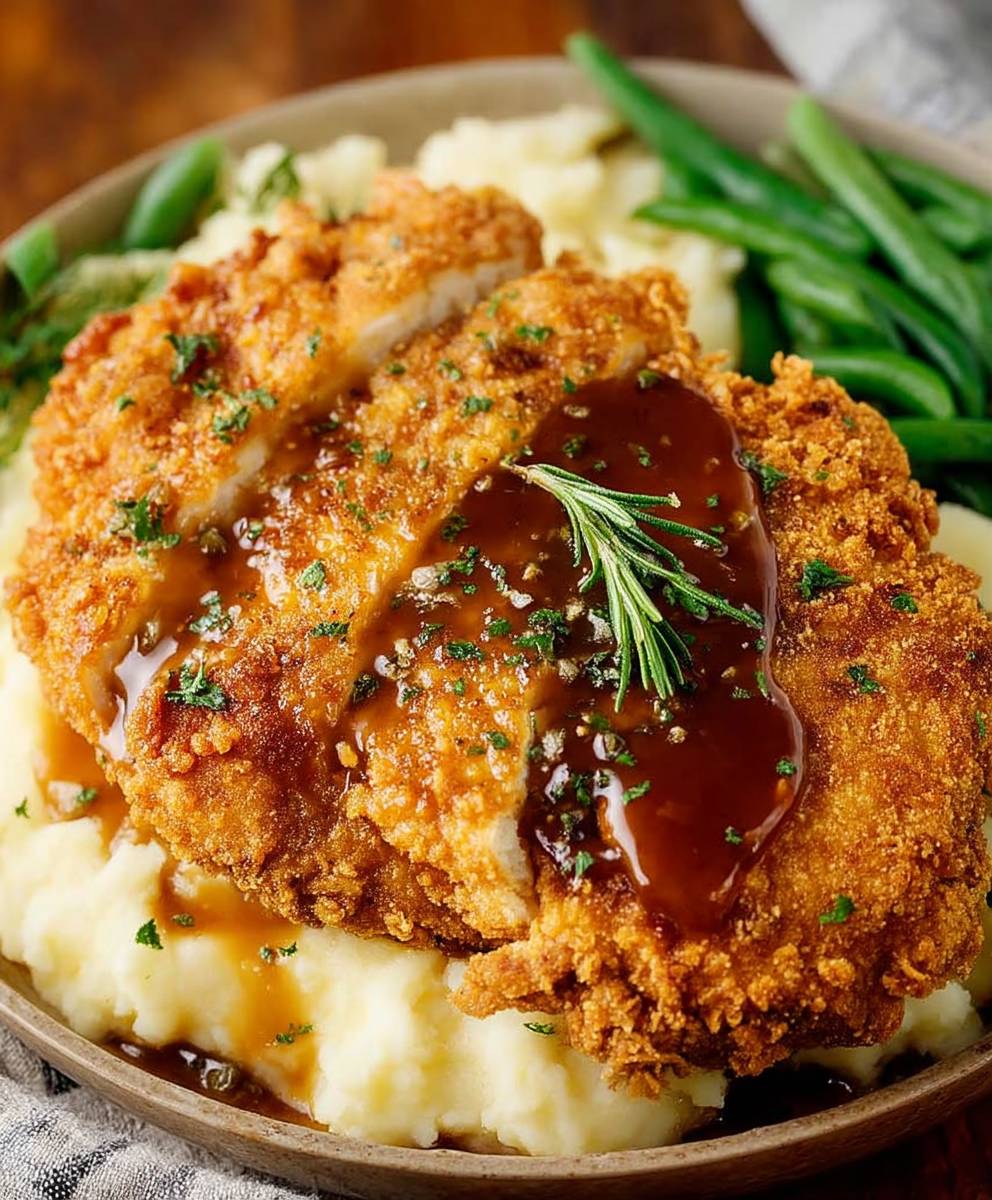
- After all the chicken is cooked, I like to serve it hot. You can pair it with classic sides like mashed potatoes, coleslaw, or cornbread for a true country-style meal.
- If you want to elevate the dish, consider drizzling some homemade gravy over the chicken. To make a simple gravy, use the drippings from the skillet, add a bit of flour to create a roux, and whisk in chicken broth until thickened.
- Garnish with fresh herbs like parsley or thyme for a pop of color and flavor.
Tips for Perfect Country Fried Chicken
- Marination Time: The longer you marinate the chicken, the more flavorful and tender it will
Conclusion:
If you’re looking for a dish that embodies comfort and satisfaction, then this Country Fried Chicken recipe is an absolute must-try! The crispy, golden-brown exterior paired with the tender, juicy meat inside creates a delightful contrast that is sure to please your taste buds. Not only is it a classic Southern dish, but it also brings a sense of nostalgia and warmth to any meal. Whether you’re serving it for a family dinner, a weekend gathering, or a special occasion, this recipe is bound to impress.
For serving suggestions, consider pairing your Country Fried Chicken with traditional sides like creamy mashed potatoes, collard greens, or buttery corn on the cob. A drizzle of homemade gravy over the chicken can elevate the dish even further, adding a rich and savory flavor that complements the crispy coating perfectly. If you’re feeling adventurous, try serving it with a side of spicy pickles or a tangy coleslaw to add a refreshing crunch.
You can also explore variations of this recipe to suit your taste preferences. For a healthier twist, consider baking the chicken instead of frying it, or using an air fryer for a lighter version that still delivers on flavor. If you want to spice things up, add some cayenne pepper or hot sauce to the breading mixture for a kick of heat. Alternatively, you can experiment with different seasonings, such as garlic powder, onion powder, or even a hint of smoked paprika, to create your own signature flavor profile.
I encourage you to give this Country Fried Chicken recipe a try and make it your own! Cooking is all about experimenting and finding what works best for you and your loved ones. Once you’ve made it, I would love to hear about your experience. Did you stick to the classic recipe, or did you add your own twist? Share your thoughts and any variations you tried in the comments below. Your feedback not only helps me improve but also inspires others in our cooking community to get creative in the kitchen.
So roll up your sleeves, gather your ingredients, and let’s get frying! I promise you won’t regret it. This Country Fried Chicken is not just a meal; it’s an experience that brings people together around the table. Enjoy every crispy, flavorful bite, and don’t forget to share your delicious results with friends and family. Happy cooking!
Country Fried Chicken: A Delicious Southern Classic Recipe
This classic Country Fried Chicken recipe features juicy, tender chicken breasts coated in a flavorful, crispy crust, making it perfect for family dinners or gatherings.
Ingredients
- chicken breasts
- flour
- salt
- black pepper
- paprika
- garlic powder
- onion powder
- buttermilk
- oil for frying
Instructions
- Marinate the chicken for at least 1 hour, but overnight is best.
- Make sure the oil is hot enough before adding the chicken. If the oil is too cool, the chicken will absorb too much oil and become greasy.
- Allow the chicken to rest for a few minutes after frying to help retain its juices.
Notes
- Aim for at least 1 hour, but overnight is best.
- Make sure the oil is hot enough before adding the chicken. If the oil is too cool, the chicken will absorb too much oil and become greasy.
- Allow the chicken to rest for a few minutes after frying to help retain its juices.


Leave a Comment