
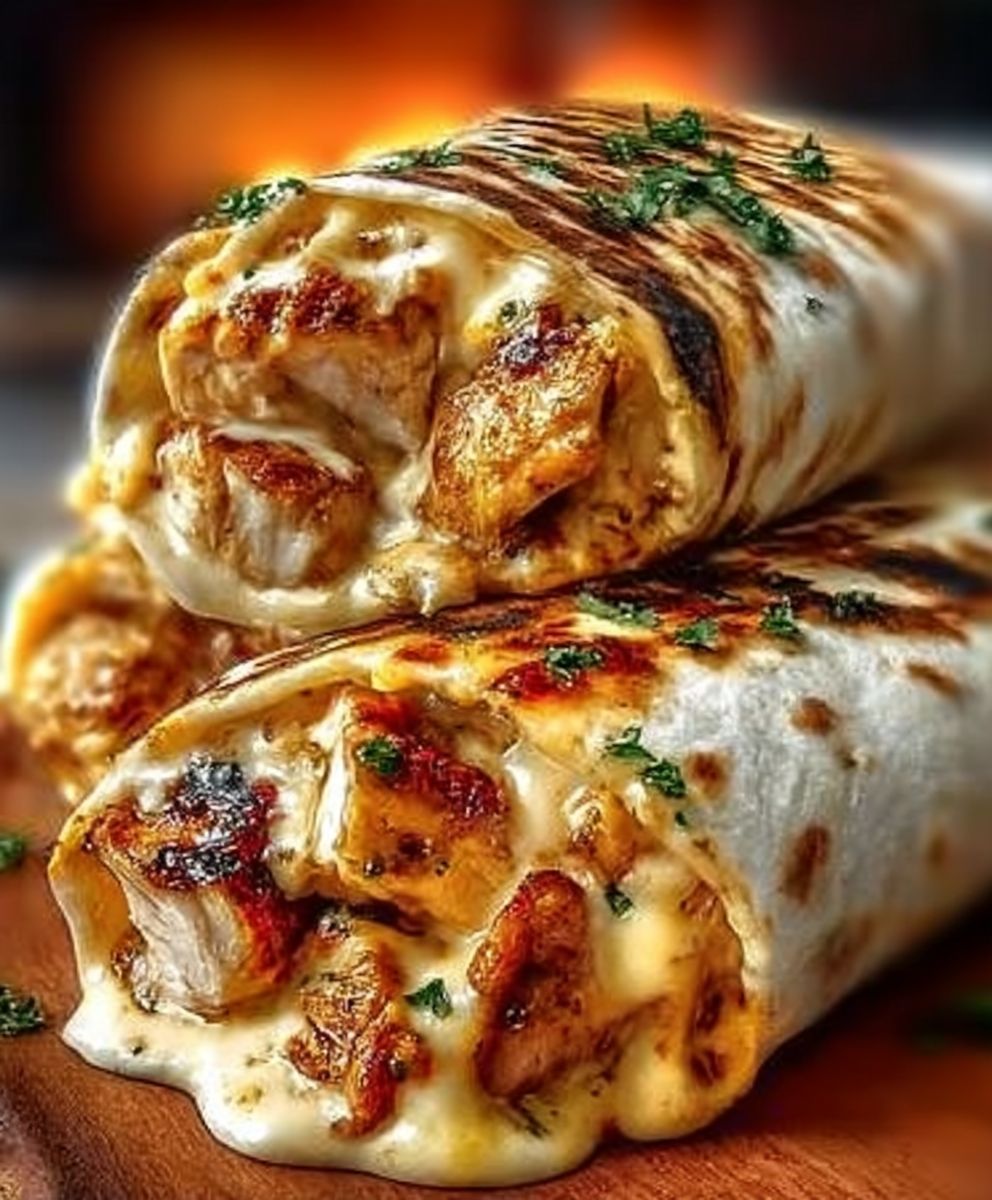
Cheesy Garlic Chicken Wraps
Cheesy Garlic Chicken Wraps are a delightful fusion of flavors that will tantalize your taste buds and leave you craving more. This dish combines tender chicken, rich cheese, and aromatic garlic, all wrapped up in a soft tortilla, making it a perfect meal for any occasion. The origins of wraps can be traced back to various cultures, but the combination of cheesy goodness and garlic has become a beloved favorite in many households.
People adore these wraps not just for their incredible taste, but also for their satisfying texture and convenience. Whether you’re preparing a quick weeknight dinner or a fun lunch for friends, Cheesy Garlic Chicken Wraps are sure to impress. The melty cheese pairs beautifully with the savory garlic, creating a mouthwatering experience that is both comforting and indulgent. Plus, they are easy to customize with your favorite ingredients, making them a versatile option for everyone.
Join me as we dive into this delicious recipe that will surely become a staple in your kitchen!
Ingredients:
- 2 large chicken breasts, boneless and skinless
- 1 cup shredded mozzarella cheese
- 1/2 cup cream cheese, softened
- 4 cloves garlic, minced
- 1 teaspoon garlic powder
- 1 teaspoon onion powder
- 1 teaspoon Italian seasoning
- Salt and pepper to taste
- 4 large flour tortillas
- 1 cup fresh spinach leaves
- 1/2 cup diced tomatoes
- 1/4 cup chopped fresh parsley (optional)
- 2 tablespoons olive oil
- 1 tablespoon lemon juice
Preparing the Chicken
- Start by preheating your oven to 375°F (190°C). This will ensure that the chicken cooks evenly and thoroughly.
- While the oven is heating, take the chicken breasts and place them on a cutting board. Use a sharp knife to slice them in half horizontally, creating thinner cutlets. This will help them cook faster and more evenly.
- In a small bowl, mix together the minced garlic, garlic powder, onion powder, Italian seasoning, salt, and pepper. Rub this mixture all over the chicken cutlets, ensuring they are well coated.
- In a large skillet, heat the olive oil over medium-high heat. Once hot, add the seasoned chicken cutlets. Cook for about 4-5 minutes on each side, or until they are golden brown and cooked through. The internal temperature should reach 165°F (75°C).
- Once cooked, remove the chicken from the skillet and let it rest for a few minutes. This will help retain the juices.
Preparing the Cheese Mixture
- In a medium bowl, combine the softened cream cheese and shredded mozzarella cheese. Mix well until the cheeses are fully combined.
- Add the lemon juice to the cheese mixture and stir until smooth. This will add a nice tangy flavor to the wraps.
- Once the chicken has rested, chop it into bite-sized pieces and add it to the cheese mixture. Stir until the chicken is evenly coated with the cheese.
Assembling the Wraps
- Take one flour tortilla and lay it flat on a clean surface. Place a generous amount of the cheesy chicken mixture in the center of the tortilla.
- Add a handful of fresh spinach leaves on top of the chicken mixture, followed by a sprinkle of diced tomatoes. If you like, you can also add some chopped fresh parsley for extra flavor and color.
- To wrap the tortilla, fold in the sides and then roll it up tightly from the bottom. Make sure to tuck in the sides as you roll to keep the filling secure.
- Repeat this process for the remaining tortillas and filling. You should have four delicious wraps ready to go!
Cooking the Wraps
- In the same skillet you used for the chicken, add a little more olive oil if needed and heat it over medium heat.
- Once the skillet is hot, place the assembled wraps seam-side down in the skillet. This will help seal the wraps as they cook.
- Cook the wraps for about 3-4 minutes on each side, or until they are golden brown and crispy. You may need to do this in batches if your skillet isn’t large enough to hold all the wraps at once.
- Once cooked, remove the wraps from the skillet and let them cool for a minute before slicing them in half diagonally. This will make them easier to eat and present beautifully on a plate.
Serving Suggestions
- Serve the cheesy garlic chicken wraps warm, with a side of your favorite dipping sauce. A marinara or ranch dressing pairs wonderfully with these wraps.
- For a complete meal, consider serving them with a side salad or some roasted vegetables. This adds a nice balance to the richness of the wraps.
- If you have any leftovers, store them in an airtight container in the refrigerator for up to 2 days. Reheat them in a skillet or microwave
Conclusion:
If you’re looking for a delicious and satisfying meal that’s easy to prepare, then these Cheesy Garlic Chicken Wraps are an absolute must-try! The combination of tender chicken, gooey cheese, and aromatic garlic wrapped in a soft tortilla creates a flavor explosion that will leave your taste buds dancing. Not only are they incredibly tasty, but they also make for a quick weeknight dinner or a fun lunch option that everyone will love.
One of the best things about these wraps is their versatility. You can easily customize them to suit your taste preferences or dietary needs. For a healthier twist, consider using whole wheat tortillas or adding a variety of fresh vegetables like spinach, bell peppers, or avocado. If you’re feeling adventurous, try swapping out the chicken for grilled shrimp or even a plant-based protein for a vegetarian version. The possibilities are endless!
When it comes to serving suggestions, these Cheesy Garlic Chicken Wraps pair wonderfully with a side of crispy sweet potato fries or a refreshing garden salad. You could also serve them with a zesty dipping sauce, such as ranch or a spicy sriracha mayo, to elevate the flavor even further. For a fun twist, consider making a wrap bar where everyone can customize their own with different toppings and sauces. This not only makes for a great family meal but also a fantastic option for gatherings and parties.
I encourage you to give this recipe a try and experience the deliciousness for yourself. Once you take that first bite, I’m sure you’ll understand why these Cheesy Garlic Chicken Wraps have become a favorite in my household. Don’t forget to share your experience with friends and family! I would love to hear how you made the recipe your own or any unique variations you tried.
So, roll up your sleeves, gather your ingredients, and get ready to enjoy a meal that’s not only easy to make but also packed with flavor. Trust me, once you try these wraps, they’ll become a regular in your meal rotation. Happy cooking!
Cheesy Garlic Chicken Wraps: A Delicious and Easy Recipe
A delicious and easy-to-make dish that combines fresh ingredients and bold flavors, perfect for any occasion. Enjoy a satisfying meal that is both nutritious and delightful!
Ingredients
- 500 g Mehl (Type 550)
- 10 g Salz
- 5 g Trockenhefe
- 350 ml Wasser
- 3 Zehen Knoblauch, gehackt
- 2 EL Olivenöl
Instructions
- In einer großen Schüssel Mehl, Salz und Hefe vermengen.
- Wasser hinzufügen und zu einem Teig verrühren.
- Knoblauch und Olivenöl unterrühren.
- Teig 12 Stunden gehen lassen.
Notes
- Der Teig darf während der Ruhezeit nicht bewegt werden.
- Für ein intensiveres Knoblaucharoma können mehr Zehen verwendet werden.


Leave a Comment